


Most curvy women are blessed with big calves like myself. lol! Finding the perfect boot for these blessed legs can sometimes be a struggle....
We are 10 days into 2017 and so far so good! Lol! I have a new understanding of many things so I welcome lessons in 2017. I now understand that learning a lesson is not like Sesame Street. My lessons typically look like a horror film produced by Lifetime TV producers. I mean the way God teaches me lessons seem so dramatic and unnecessary! Geesh! But, I know in order for me to level up, God has to have HIS way with me. I am on a constant quest to surrender it ALL and accept my horror movie lessons.

Some things that I have committed to doing this year that I wanted to share here on the blog! I absolutely love devotionals and reading them encourage me to stay focused throughout the day and not to sweat the small stuff. Here are 2 devotionals that I am reading daily for 2017! I am sooooo excited about them. If you follow me on social media, you will see that I occasionally share the daily devotionals. My goal is to invite God in and to quiet the noise and tune into HIM.

The
other thing that I wanted to share that I have committed to doing is something
I like to call “journaling on the go”! There is so much happening and life
seems to get busier every day. I love journaling and I have some of the most
beautiful journals but to be honest I don't have the time like I used to, to
journal the way I want to. I have a stack of cut up papers next to these vases and
I write my prayers down with a date and then I write my praise reports out and just
drop them in!
So much happened in 2016 and I don't honestly feel like I
captured enough of the journey so my goal is to capture more this year. God is
doing so much at such a rapid speed that I just want to be able to share my
testimony with others. I also want to use the praise reports as a reminder to
myself to keep trusting HIM! If He has done it before He can most definitely do
it again! Same God right now, Same God back then!
I pray that your 2017 is off to a great start!
Peace & Blessings!
We are 10 days into 2017 and so far so good! Lol! I have a new understanding of many things so I welcome lessons in 2017. I now understa...
My husband and I received so many beautiful cards on our wedding day and like so many of your cards they ended up in a box tucked away. I loveeee a good card. I admit it, cards always make me cry not only because of what they say, but because I just think cards are very thoughtful and such a kind and heartfelt gift. I decided to pull out my box of cards from our wedding 2 years ago and use some of these thoughtful cards to decorate our new place. This was such a cute and inexpensive way to decorate and I enjoyed going back down memory lane reading the encouraging words of love from our friends and family. I think this would be so cool for a nursery using cards from a baby shower.


Here area few pics of the finished project!
 |
| The finished product! |
 |
| Some of the beautiful cards |


A small clip from my snapchat having fun with this DIY project.
My husband and I received so many beautiful cards on our wedding day and like so many of your cards they ended up in a box tucked away. I lo...
I'm backkkk!!! It's been a few weeks since
my last blog post and I am thrilled to be back. I have so much exciting news to
share! I had to take a little break from blogging to get into full planning
mode for my family reunion. My family has a reunion in a different city
every year and this year the Chicago family had the pleasure of hosting. We
truly had an amazing time as you will see from the photos! As always love is in
the details.
 |
| We kicked off Friday night with a red carpet social! My very own super talented uncle designed the logo that we used on this step and repeat. |
 |
| yes, this is my Uncle who walked me down the aisle and he is really so much fun!!!! |
 |
| My handsome Grandfather and my fabulous Aunt Hazel!!! |
 |
| My Mother with my 2 Aunts!!! |
 |
| Props that I made for the red carpet fun!!! Everyone loves a good sign. |


I'm backkkk!!! It's been a few weeks since my last blog post and I am thrilled to be back. I have so much exciting news to share...
Part 1 - 8.31.13

I often hear women talk about their weddings and everything that they want this day to be. I knew I wanted to be married one day but I must admit that I had never thought of what this ceremony would look like. As I begin to plan our wedding I really just wanted to have fun and I wanted our personalities to shine through. I believe weddings are very special ceremonies and although most brides feel like it's their special day, it's really a special day for every friend, family member, and person that's there to share those moments with you. I had a great time planning our wedding but we're no millionaires so I will be sharing some of the creative aspects that went into planning our wedding.
For those of you who don't know, my husband is a DJ and a true hip hopper from Harlem, NY. If you're interested in hearing more of our crazy love story, click the picture below which a link to our wedding website.
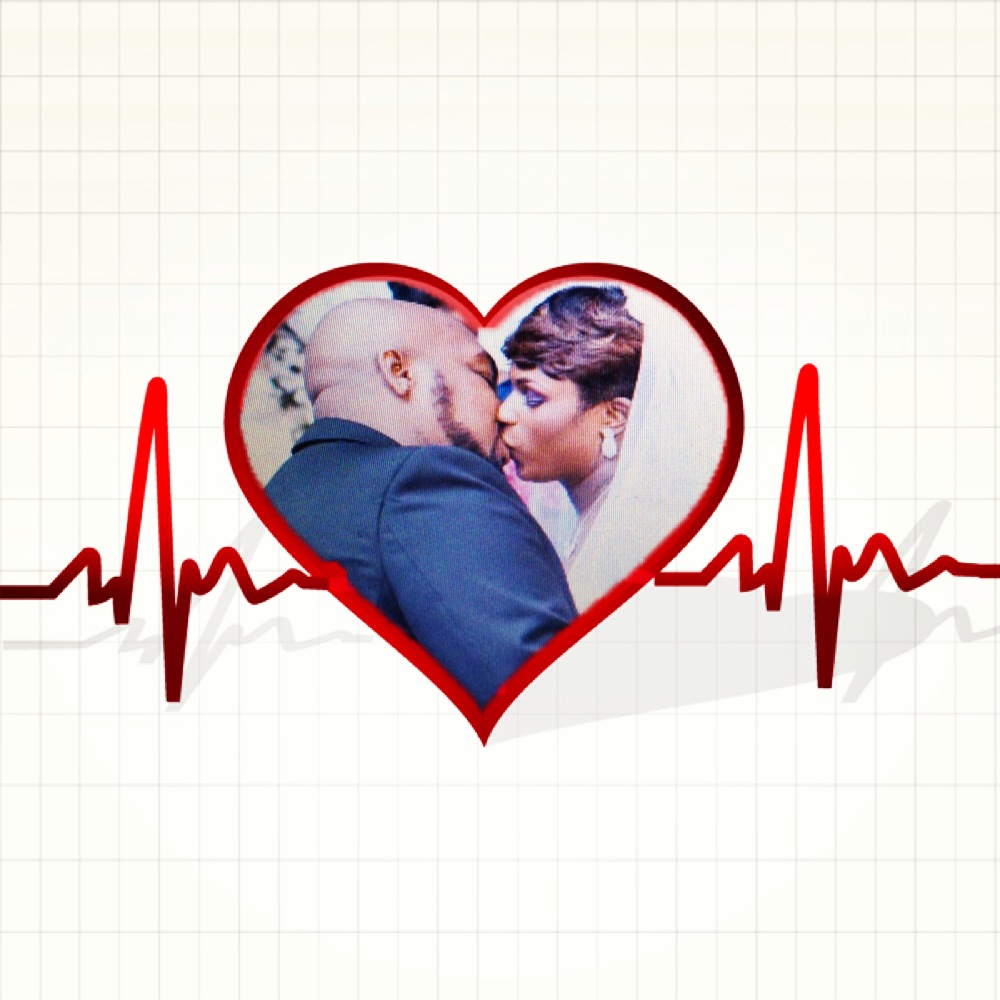
Once again, I think weddings should reflect the couple and I tried my best to be true to us while planning.
I'll be sharing many different pieces of my wedding here on this blog. This is Part 1, which will cover our "guestbook" and what we decided to do with FEATHERS!!! Fun! Fun! Fun!
 |
| Our Monogram! We hired an amazing college student to create this for us. I love shoes so we incorporated that and my husband is a true DJ who loves records so we chose the record as the center. |
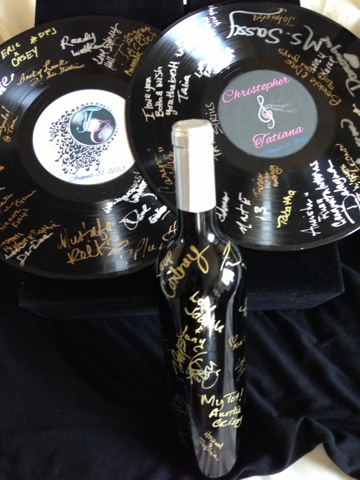 |
| Our guestbook! We decided to have guests sign records with gold and silver pens! These records also doubled as decor in our home after the wedding as reminder of the love and support from our family and friends. We have them framed and posted in our living room. |
 |
| We also had our guests sign a bottle of wine that we opened on our 1st Anniversary! We purchased the bottle and simply took the label off. |
 |
| The centerpieces we used for our reception! Yes, feathers! Inexpensive and fabulous! They really gave the dull banquet room a pick me up and once again were much cheaper than flowers. |
 |
| Okay, so this picture is NOT to capture this kiss! lol! I wanted to show how we used the blinged out square for not only our centerpieces but for the candles as we walked down the aisle. |
 |
| We attached loose feathers using a glue gun to the gold and silver markers. |
 |
| Our super handsome ring bearer Jordan showing off his ring pillow with the feathers. Oddly, enough I got luck and found this pillow at HobbyLobby! |
 |
| My bouquet! I purchased little rhinestones and had them put it in my bouquet with of course more pops of feathers! |
 |
| His boutonniere & my bouquet with rose, a little bling and feathers! |
 |
| My Louboutin Pigalle with the garter with feathers and the plain toss garter! |
 |
| Our shoes! Yes, he wore sneakers in our wedding, it's his personality so why would I stop him?! |
Part 1 - 8.31.13 I often hear women talk about their weddings and everything that they want this day to be. I knew I wanted...
We are in the days of FANCY, everything and everyone are always just so darn....Fancy! So, when I got the news that one of my favorite people was having her 1st child, I knew that this shower had to be FANCY! lol! Although I like and enjoy my share of fancy, I definitely believe in being practical and enjoying a DIY project. Some people are immediately turned off by the thought of any type of DO It Yourself projects, but as you will learn I absolutely love them! Doing It Yourself does NOT mean you have to sacrifice the FANCY fun stuff that we all love. With that being said, I had this great idea for my cousin's baby shower to create life size blocks to celebrate Baby Marley! Not only were they awesome decor, but they doubled as a backdrop for photos. If you are interested in creating life size blocks for an event, your child's room, or etc please see the step by step instructions below. But first..... a few pics! You can call me "Tot the Builder" aka "Bob the Builder" HAHA!
 |
| My cousin YaKema, looking simply stunning at 8 months pregnant! |
.jpg) |
| Kema & I |
 |
| Enjoying a little Gnarly Marley Punch! |
.jpg) |
.jpg) |
| Family...Cousin Love! |
.JPG) |
| The beginning of the blocks to the finished product! |
Creating your Life Size Blocks
Materials:
Large Cardboard Boxes (www.uhaul.com)
Wrapping Paper (We used a matte black paper from (www.papersource.com)
Gorilla Glue (Michaels or Amazon)
Wooden Letters (www.michaels.com or any Craft Store)
Step 1 - Wrap the boxes with wrapping paper (We decided to have the boxes professionally wrapped to ensure that they were neat)
Step 2 - Apply wooden letters using Gorilla Glue. It's easier to put glue on box first so that you can ensure that placement is correct
Step 3 - Allow 30 min to dry
Step 4 - Optional - We added large Avery circle labels to them to make it pop a little more
Step 5 - Stack your blocks and pose for some pics!!!
We are in the days of FANCY, everything and everyone are always just so darn....Fancy! So, when I got the news that one of my favorite peopl...


